If you’re here, I’m guessing you’ve wandered into the scary cave that is the Facebook backend. Well, congratulations for making it this far! If you are using Facebook to run ads, then the best way to get the most bang for your buck is to utilize the power of Facebook Pixels.
Don’t let the term and weird techiness scare you off. Creating and installing a basic Facebook Pixel isn’t as hard as it sounds. I’ll tell you everything you need to know in today’s #WhatIsWednesday.
So… what is a Facebook Pixel? When installed on a website, a Facebook Pixel will drop a cookie that will track visitors on your website so you can track and advertise to them later. I know, diabolical, right?
Facebook Pixels: Here’s How It Works:
After you have the Facebook pixel installed, it will track any visitors to your site who are currently logged into Facebook. You can see which pages on your site they are viewing and how long they stay there. You can choose to target people who have visited your website in the past 24 hours, people who have visited your website in the past 180 days but have not been back in 30 days, people who have visited a specific page on your site and more.
Let’s say you want to track which of your customers are doing certain things on your site. That’s where custom conversions come in. With the Facebook Pixel, you can select conversion events, such as people who signed up, bought a product or you can even set it to let you know how many people spent X amount of dollars.
My favorite part about Facebook Pixels is the ability to get Facebook to create an audience that looks alike certain people tracked by your pixel. For example, your Facebook Pixel will know everyone who has visited your review of the Automatic Banana Peeler in the last 60 days. You can hop into Facebook and ask them to make a “lookalike” audience of all of these banana lovers to the similarities with all these banana lovers (pages they like, activities, age, location etc.) and advertise your Automatic Banana Peeler to them.
Now I want to be clear, to protect everyone’s privacy you won’t be able to see WHO exactly these people are but Facebook will put them in a nice little group and you can tell Facebook to go and advertise to everyone in that group.
Here’s How You Gain Access to Your Facebook Pixel
Say goodbye to your friends’ status updates and baby pictures and head on over to the Ads Manager page.
1.Click on the menu:
- Assets ->Pixels
- Name your Pixel
- Click “Create Pixel”.
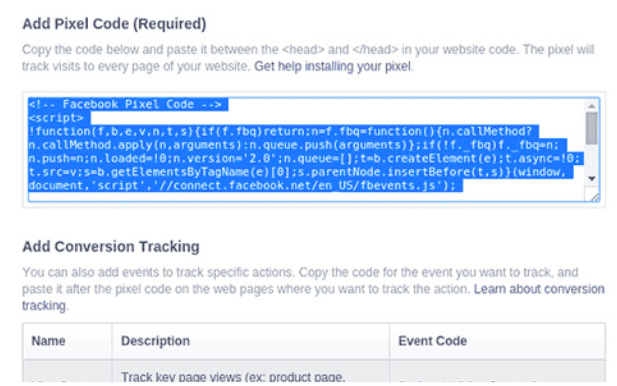
Voila, you’ve got a Pixel code. It should look something like this:

Now, put this pixel code in the header of each page of your website.
Managing and utilizing Facebook Pixels can cover many MANY hours in online courses. The steps above only cover the most fundamental part of installing the base pixel Facebook code that will allow you to start tracking those folks that are visiting your website. However, every business owner that is considering advertising on Facebook should follow the steps above.
Happy tracking!

